
The Ultimate Homeowner’s Checklist: 10 Easy Steps to Reclaim Your Yard from Snails
If you’re the kind of family who spends weekends building fairy gardens, hosting backyard birthday parties, or teaching the kids to grow their own strawberries, you already know your outdoor space is an extension of your home traditions. But there’s one uninvited guest that can turn a magical garden into a slimy mess overnight, and that’s the common snail. Between the trampled hostas, the silvery trails across the patio, and the nibbled lettuce your kids were so proud of growing, a snail infestation can quietly undo weeks of family effort. This checklist breaks the problem into manageable steps so you can get your yard back to being a place for play, not pests.
Think of this as a family project checklist, the same way you’d tackle a big Disney trip itinerary or a seasonal craft plan. Snails aren’t glamorous, but getting rid of them methodically means fewer surprises for little bare feet running across the lawn and more confidence that your garden beds will actually produce something you can eat or enjoy. We’ll walk through the first four checkpoints here: identifying the problem, removing hiding spots, managing moisture, and setting up barriers and traps.
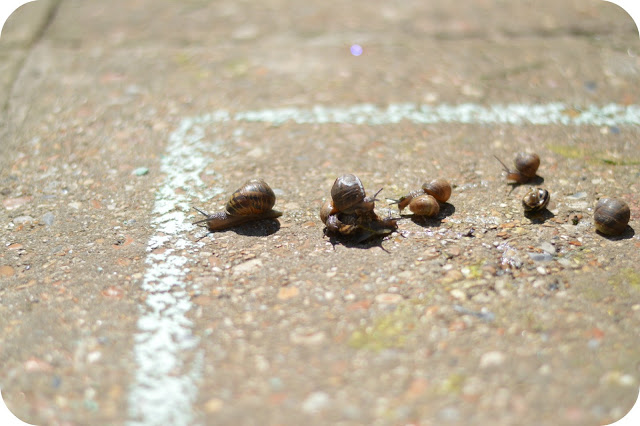
Step 1: Identify the Problem
Before you can fix a snail problem, you need to confirm it’s actually snails and not another pest causing the damage in your yard. Look for irregular holes in leaves, especially on tender seedlings, and check for the telltale silvery slime trails that show up in early morning or after rain. Snails tend to feed at night or during overcast, damp weather, so a flashlight tour of your garden beds after dusk is often the easiest way to catch them in the act. If you want a deeper breakdown of detection and treatment methods, this guide on 10 easy and effective ways to get rid of snails in your yard walks through the process in more detail. Once you’ve confirmed snails are the culprit, you can move on to addressing where they’re living and breeding in the first place.
It helps to understand just how quickly a small snail problem can snowball into a full infestation if it’s ignored. A single snail can lay up to 80 eggs per clutch, and it may lay several clutches a year, which means the population in your yard can multiply fast without anyone noticing until the damage is obvious. Snails take about two years to reach maturity, but they can live as long as five years, so an established colony can keep reproducing season after season if left unchecked. Knowing these numbers helps explain why early identification and action matter so much for anyone trying to protect a vegetable patch or a kid-friendly play lawn.
Step 2: Remove Hiding Spots and Shelter
Snails are creatures of habit that spend daylight hours tucked away in cool, moist hiding spots, only to emerge and feed once the sun goes down. Boards, stacked stones, piles of leaves, dense ground covers, and cluttered garden debris all make ideal daytime shelters, so your third checkpoint is a thorough yard cleanup. Walk your property and clear away anything that offers snails a shady, damp refuge, paying special attention to areas near flower beds, vegetable gardens, and the base of fences where debris tends to accumulate. According to Ipm, a good snail and slug management program relies on a combination of methods, with the first step being to eliminate all places where they can hide during the day, such as boards, stones, debris, weedy areas, and dense ground covers. This single step often makes a noticeable dent in the population before you even introduce traps or barriers.
Once the obvious shelters are gone, take a second pass through your landscaping and thin out overly dense plantings that create their own microclimate of shade and humidity. Ground covers like ivy and thick mulch layers are cozy for snails, so consider pulling mulch back a few inches from the base of prized plants or swapping dense ground cover for something less inviting near high-traffic garden beds. This doesn’t mean stripping your yard bare, it simply means being intentional about where moisture and shade collect. Kids and pets will still have plenty of greenery to explore, but the snails will have far fewer places to wait out the daylight hours.
Step 3: Manage Moisture and Drainage
Snails thrive in damp conditions, so your next checkpoint is taking a hard look at your watering habits and drainage setup. Overwatering lawns and garden beds creates the exact humid environment snails need to survive and reproduce, so switching to early morning watering instead of evening watering gives the soil surface time to dry out before nightfall, when snails are most active. Check for areas where water tends to pool, such as low spots in the yard or clogged gutters that drip onto garden beds, and address those drainage issues directly. Reducing excess moisture won’t eliminate snails on its own, but combined with shelter removal, it makes your yard a much less hospitable place for them to settle in.
If you use drip irrigation or soaker hoses, consider adjusting the schedule so beds aren’t left soggy for extended stretches, since consistently damp soil is essentially an open invitation. Raised garden beds with good drainage tend to have fewer snail problems than low-lying beds that stay wet, so if you’re planning a new vegetable patch with the kids this season, that’s worth keeping in mind. Small adjustments like these are easy to fold into your existing yard routine and require no special equipment or expense.
Step 4: Deploy Physical Barriers and Traps
With hiding spots cleared and moisture under control, your fourth checkpoint is setting up physical defenses that snails simply can’t cross or that lure them away from prized plants. Copper tape wrapped around raised beds or pots creates a mild electrical reaction that repels snails on contact, while a ring of crushed eggshells or food-grade diatomaceous earth around vulnerable plants works as an abrasive barrier they’ll avoid crossing. Beer traps, shallow containers filled with beer and sunk into the soil, are a classic and effective option since snails are drawn to the yeast and end up trapped inside. Rotating between these methods keeps your defenses varied, since snails can sometimes find ways around a single barrier type if it’s the only one in place.
The table below summarizes some key snail reproduction figures that explain why a consistent, multi-step approach matters more than a one-time cleanup.
| Statistic | Figure |
| Eggs per snail annually | 430 to 500 eggs per year |
| Eggs laid per clutch | 80 spherical eggs per laying event |
| Laying frequency | Up to 6 times per year |
| Time to snail maturity | Approximately 2 years |
| Snail lifespan | Up to 5 years |
Working through these first four checkpoints, identifying the problem, clearing shelter, managing moisture, and installing barriers, gives you a solid foundation for reclaiming your yard. The remaining steps in a full snail management plan build on this same logic of removing what snails need to survive while making your outdoor space less appealing to them. With a little consistency, your family can get back to enjoying backyard traditions without slimy trails crossing the patio every morning.