I’m sure I’ve complained before that the mister, despite being a software engineer for IBM, loves to see me struggling learning about the nuts and bolts of blogging as opposed to him just doing things for me, and so I’ve been on quite a steep learning curve over the past two years.
I work in Blogger, and sometimes it frustrates me that I can’t just get a gadget to do what I want, I have to be creative with how I go about things.
Each time I stumble, I google it and learn a little bit more. It never occurred to me to blog about it before, so I hope that I can help someone the way other tutorials have helped me.
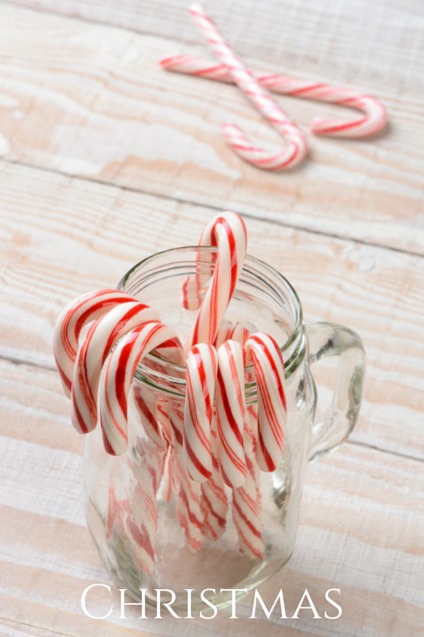
Today I wanted to make a page that displays all posts with a Christmas label.
CREATING A CLICKABLE GRAPHIC FOR A LABEL
Make your graphic and save it to your desktop (or wherever if you’re more organised than me).
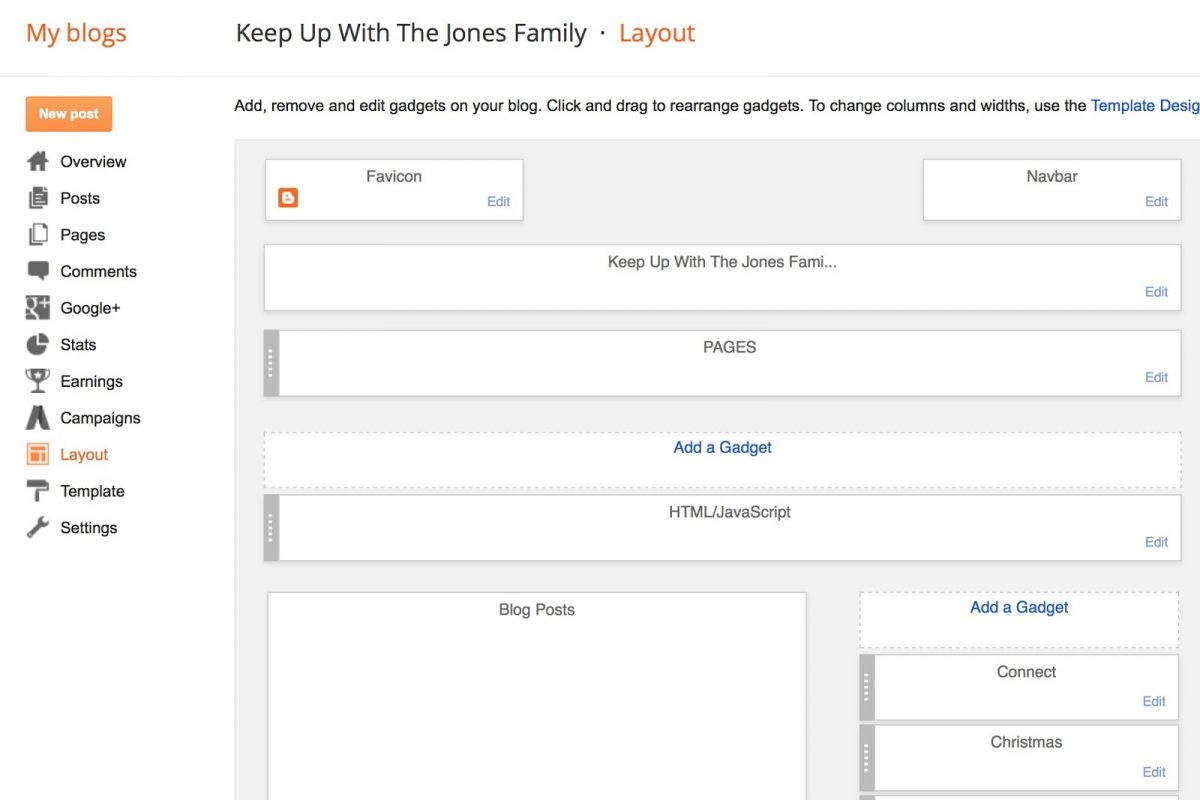
Go to your Blogger layout page, select add gadget in the sidebar (or wherever you’re putting your label, you can move it around afterwards).
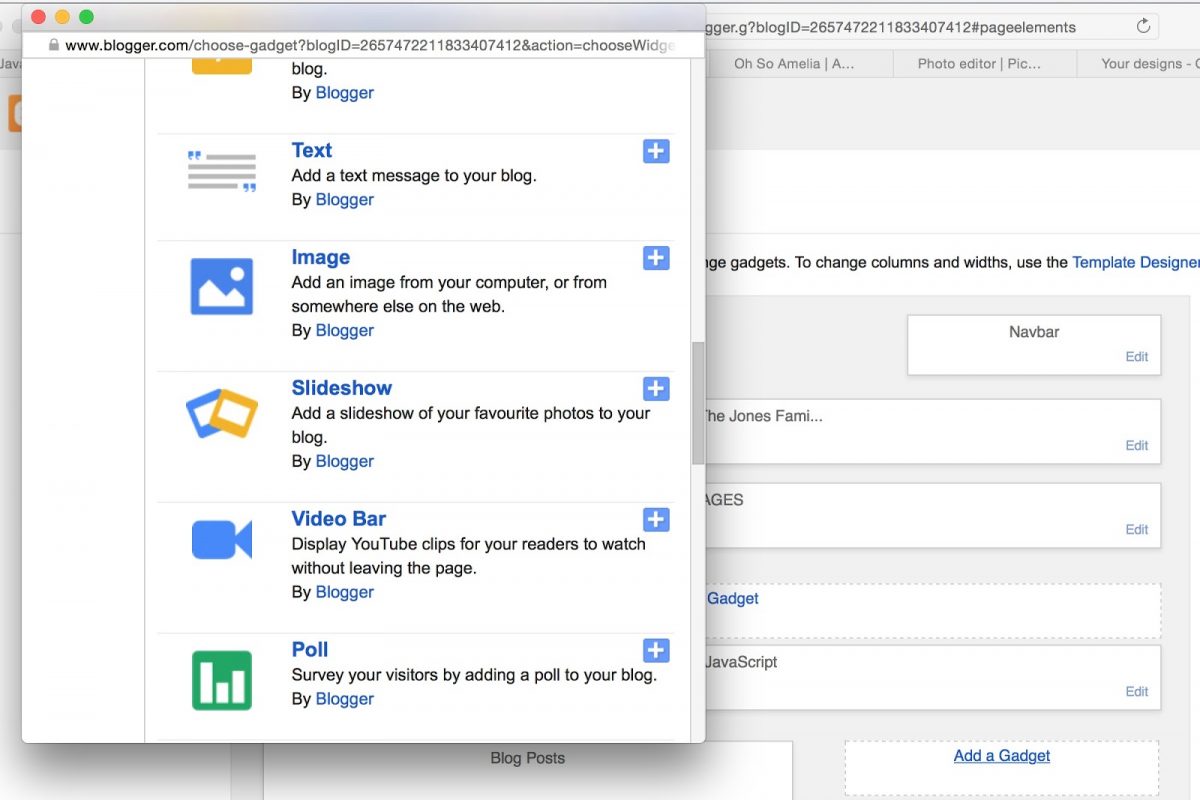
Select the Image gadget and click on the plus sign. You could use another gadget, but this is the quickest and easiest way.
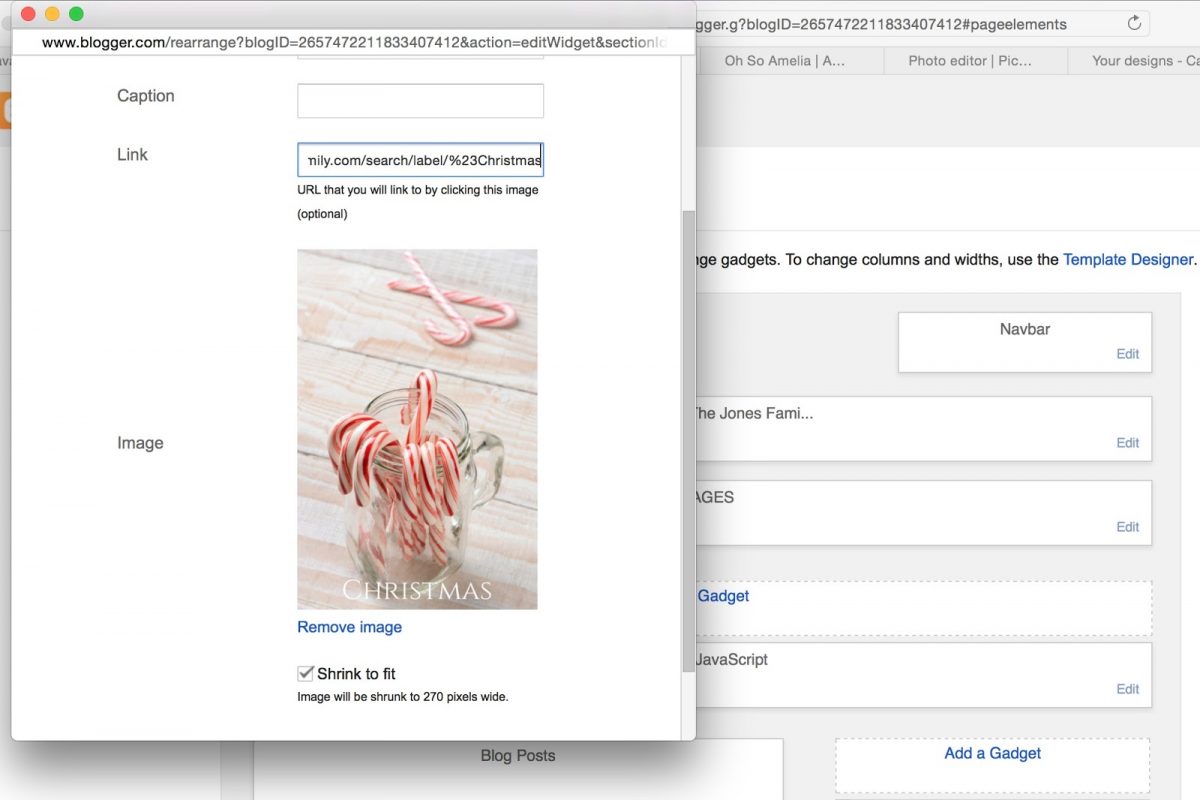
Upload your photo. Click shrink to fit if your image is not the correct measurement for your sidebar.
Now your photo will be displayed on your blog, and you need to link it to the posts you want to display.
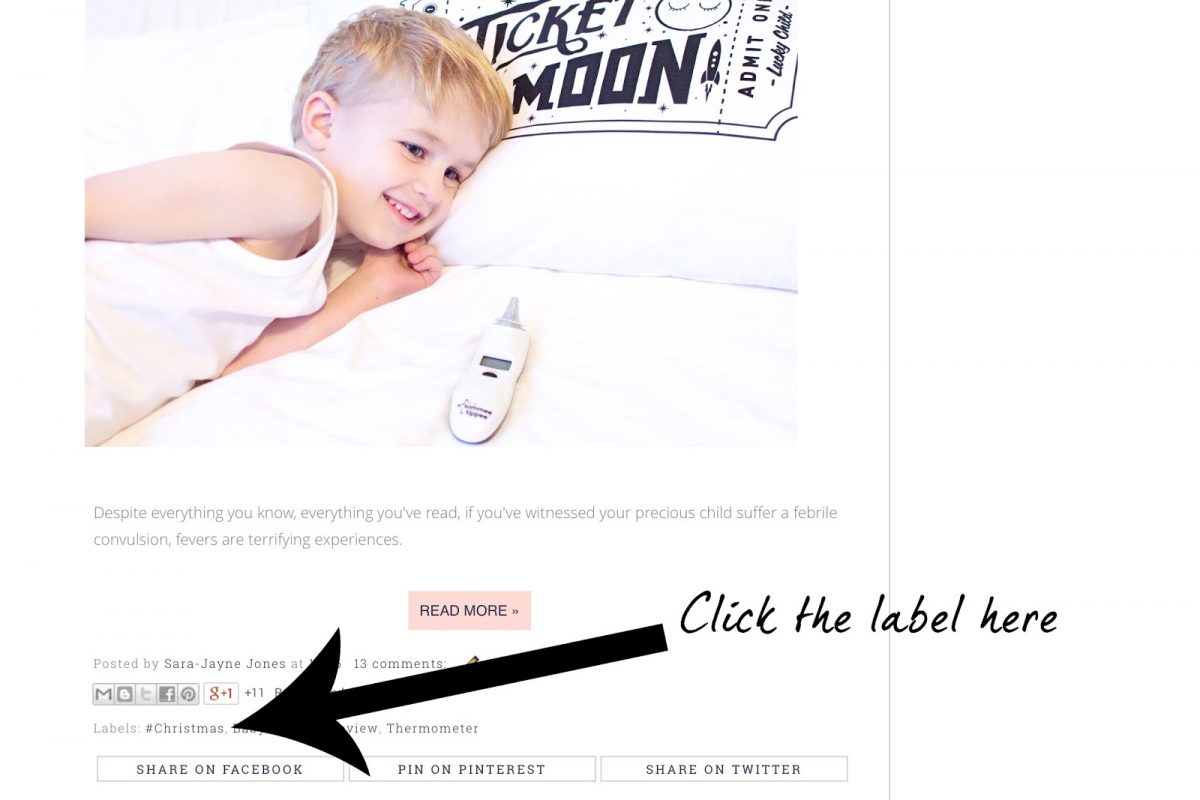
So, find a post that you’ve written which has that label. Mine was Christmas – and so I found a Christmas post and scrolled to the foot of it, where the labels are. Click on the label.
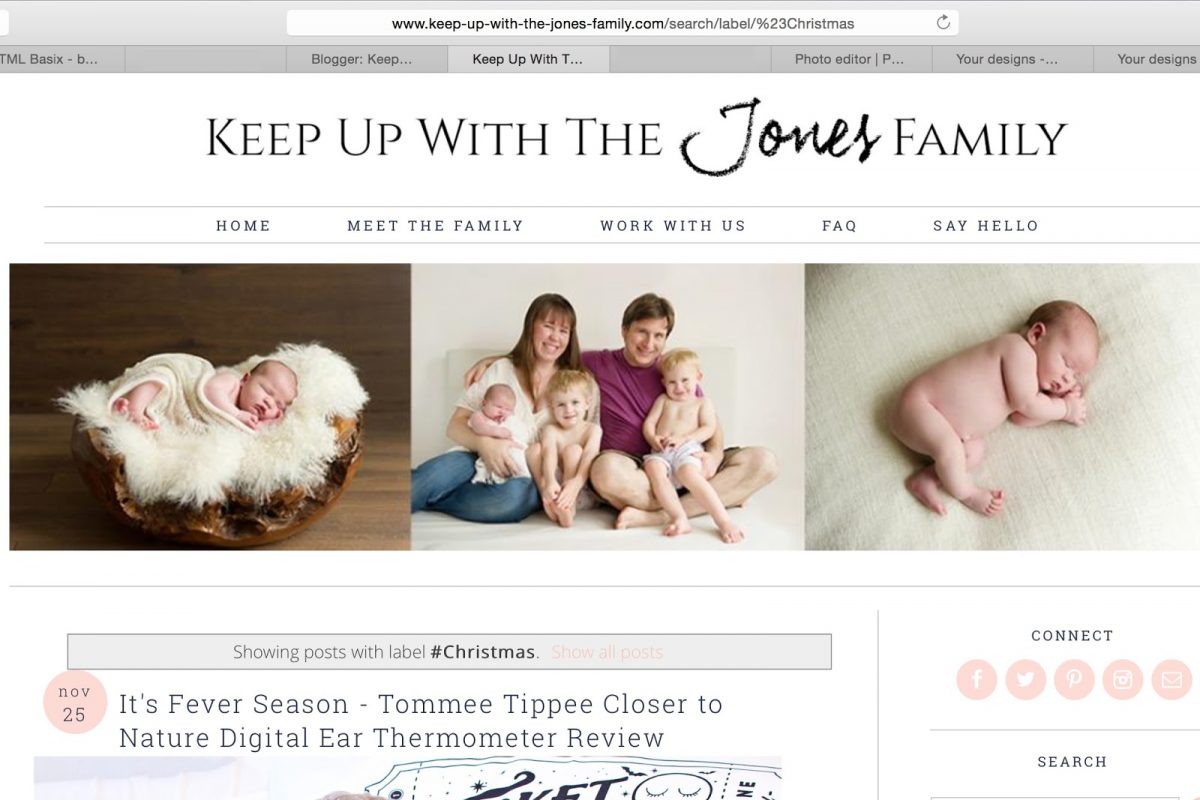
All posts with that label will be displayed. Copy the link (below).
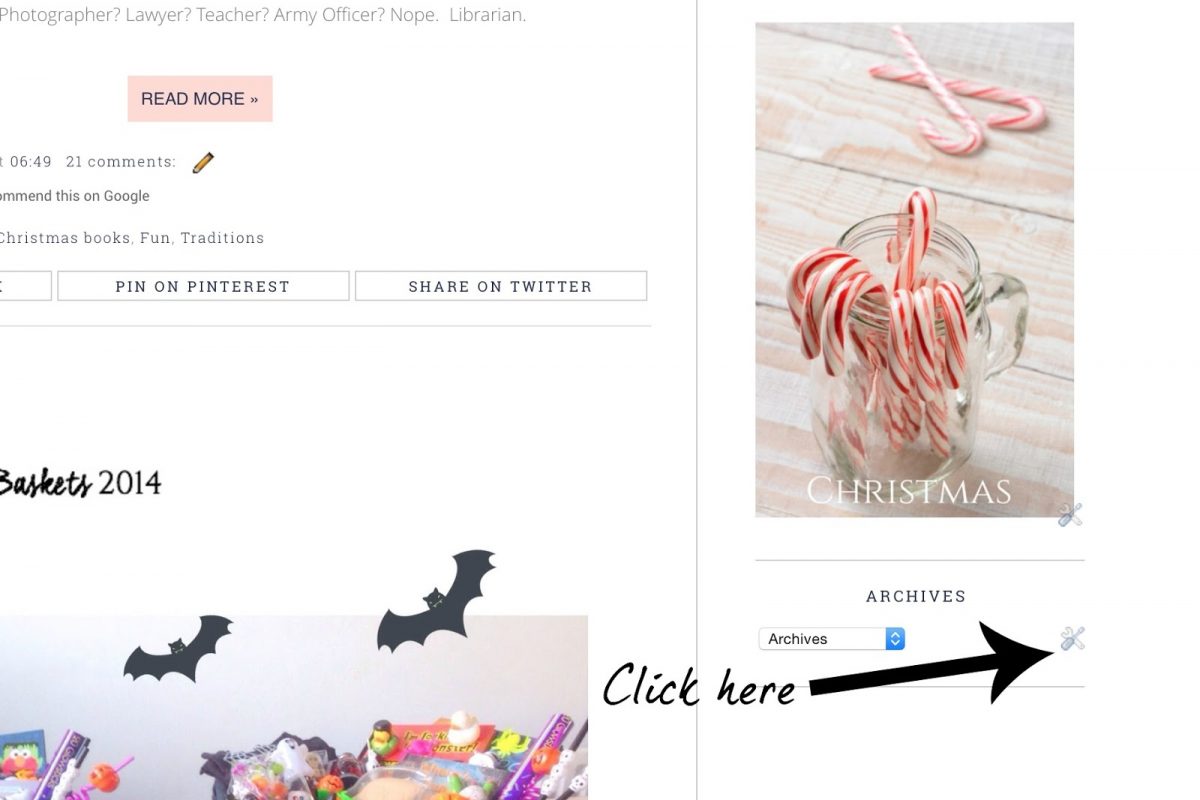
Now return to your blog. Find your picture again. Click on the little spanner and screwdriver to open the gadget.
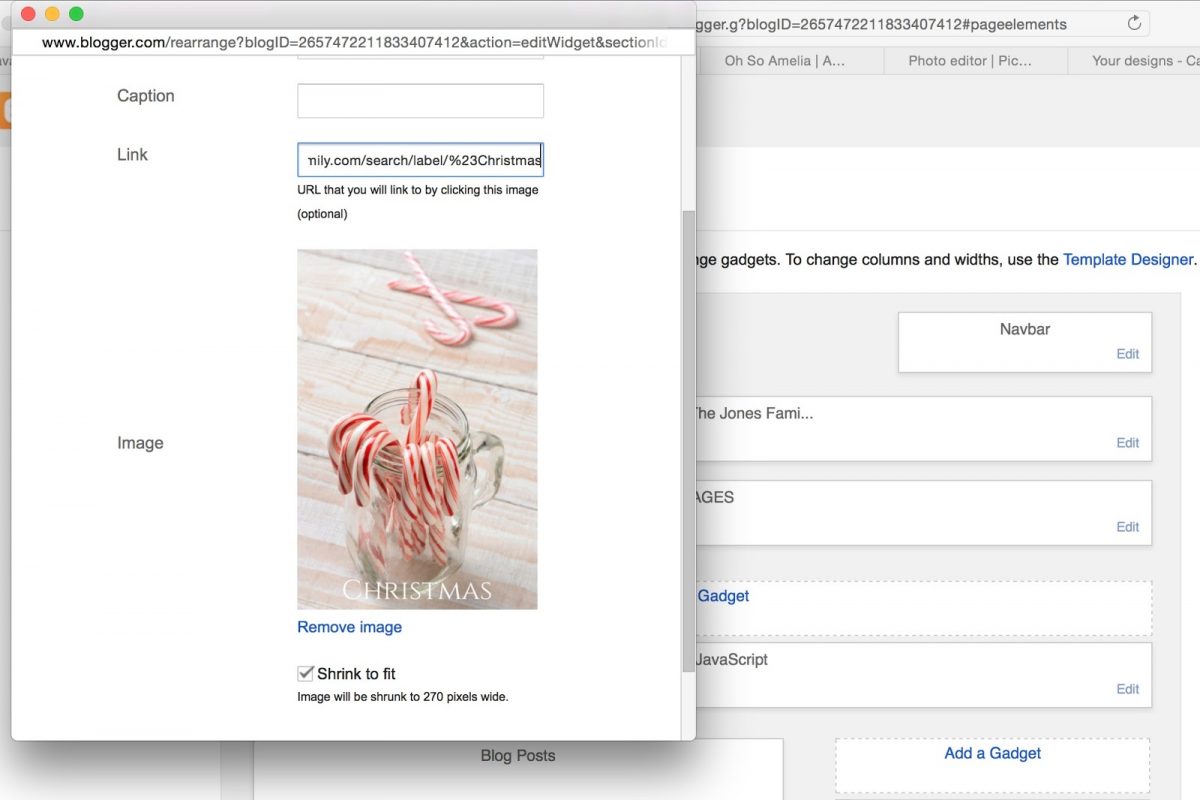
Paste in the link that you copied, and save the gadget again.
And that’s it! Clickable label complete!
Please note, I am no expert, I have no knowledge whatsoever, just what I’ve picked up along the way. I hope this helps some of you!



This is such a cool and different way to display labels! I think this would do really well on some blogs. For mine, I think I have almost too many pictures to begin with, so picture labels on the sidebar might not work out ideally. Like you mentioned, it is always nice to find helpful tutorials like this on blogging things. You did a great job with your first one, especially with the giant arrows and 'click here!' That makes it super easy for readers to follow along and make sure they are doing the right things.
What an awesome idea! I wonder if it's a similar process on WordPress? Thank you for posting such a simple, easy to follow tutorial- even if I may not be able to utilize it word-for-word on my server, you've sparked an interest in learning how and I will definitely share your post with by friends using Blogger. On a side note- your babies are beautiful 🙂
This is such a helpful tutorial! I use wordpress so I will not be able to use this tutorial, but I love how you use step by step photos so everyone knows exactly what to do. Those are my favorite ones! I get so confused doing things with my blog, it's always nice to see some photos on how to do it. Great job!
Great tutorial! I love these types of tutorials! I was out of blogging for a long while and seemed to forget everything I had known. So these things are super useful to me and I'm sure many others as well!
This is such a cool tutorial, I have been doing a few tutorials myself for the month of January and I have been enjoying it but I must admit I did not know this one so I will be working on it tonight thanks for sharing. I love learning how to do things myself than having to pay someone
That's really helpful for Blogger users! I love all the screenshots. I too just randomly pick stuff up along the way. I think that's how we all learn- as we go. Well, except for those who actually went to school for web design and what not. Then again, I bet they learn as they go along too, since the internet is always changing.
This is a fantastic tutorial. Thanks for sharing the details on how to do this- I know many bloggers who can benefit. I'll be sure to pass this along, thanks again.
I have never heard of a clickable photo tags before! I love tutorials like these they make it so much easier to learn how to do these things on my own. Love your step by step details!
You definitely provided your readers with an informative tutorial, and all of the images are very helpful for understanding the process. I can't benefit from this because I use WordPress for both of my blogs. I used to contribute to a Blogger blog a ways back, and I must say, the layout, features and functions have come a long way since I used it.
I know your pain. Trying to learn all of these behind the scenes things can be so hard. Your tutorial does a great job walking through each step. The pictures make all of the difference. I do much better when I have pictures.
Wow this is so cool! I am so glad that this is for the same format that I use too! I definitely want to create this soon! It makes it look so pretty and organized! thanks for sharing this great tip I really appreciate it. Great info for newbies like me!