Easter Memories 2013: The Rice Krispie Chick Nests (DIY Post)
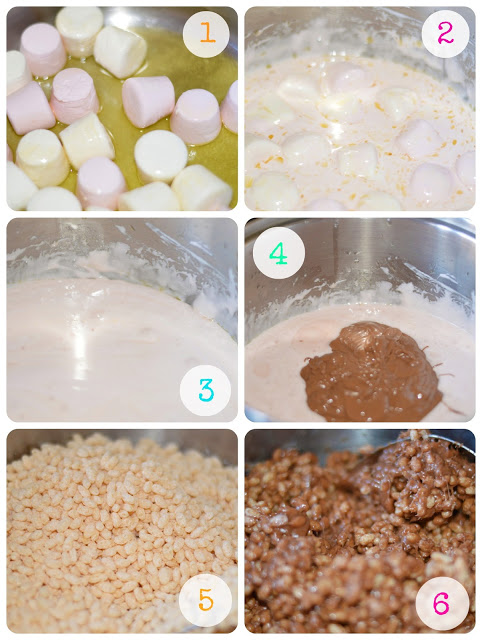
Rice Krispie nests are infinitely better than the Shredded Wheat ones that we made last year. So much less painful in every way. Below is our step by step method because you can (I discovered last year) get it wrong. So wrong. Let’s not relive the frustration of that delicious (welded on) mess though, and get it right this time.
Step 1:
Melt butter in pan, add marshmallows (I used a bag of pink and white ones)
Step 2:
Melt gently and completely, stirring as you go.
Step 3:
In the background, melt chocolate in the microwave, when marshmallows and butter are completely combined.
Step 4:
Add in melted chocolate and stir.
Step 5:
REMOVE FROM HEAT and add Krispies.
Step 6:
Make sure you took heed of the big red warning ~ take your pan off that hob or live to regret it for the next hour as you’re chipping Krispies like granite from your precious pan.
Step 7 (below):
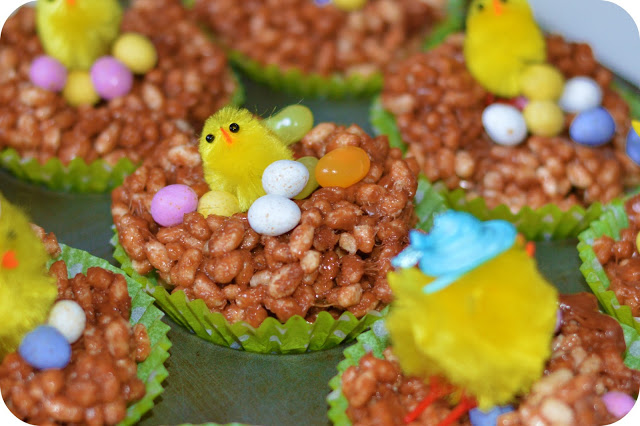
Our Little Adventurer spooned them into muffin cases (we like a big nest here, for all those chicks) and added the Mrs. Hens and eggs (jellybean and tiny eggs). We put ours in the refrigerator to cool quicker.
As Gordon Ramsay (our neighbour, don’t you know, although we’ve yet to see him in Waitrose) would say, Rice Krispie Easter Nests… Done.

