SPRINGTIME FLOWER WREATH DIY TUTORIAL
It’s not very often that you get any time to do something purely for the joy of it – and so when my mom and dad came to stay for a few days, I managed to steal a few minutes to myself at the table and whip up one of my favourite decorations – a flower wreath. I had some flowers left over [still] from my first photography workshop [which was amazing and so much fun that I wanted to do another one straight off the back of it] and so I thought rather than just leaving them in a vase to bloom, I’d do something a little different.
I used to look at wreaths and sigh. I always wanted to make them and decorate the house with them, especially at Christmas, but I had no idea how easy they were to make. I took a little workshop last year and my eyes were opened. I promise you that they’re the easiest to make and so beautiful around the house and garden – instant air freshener, which is brilliant if you have stinky little boys like me! Haha. Anyway, let me show you how you can make one below, in about ten minutes!
I’m slightly in love with it.

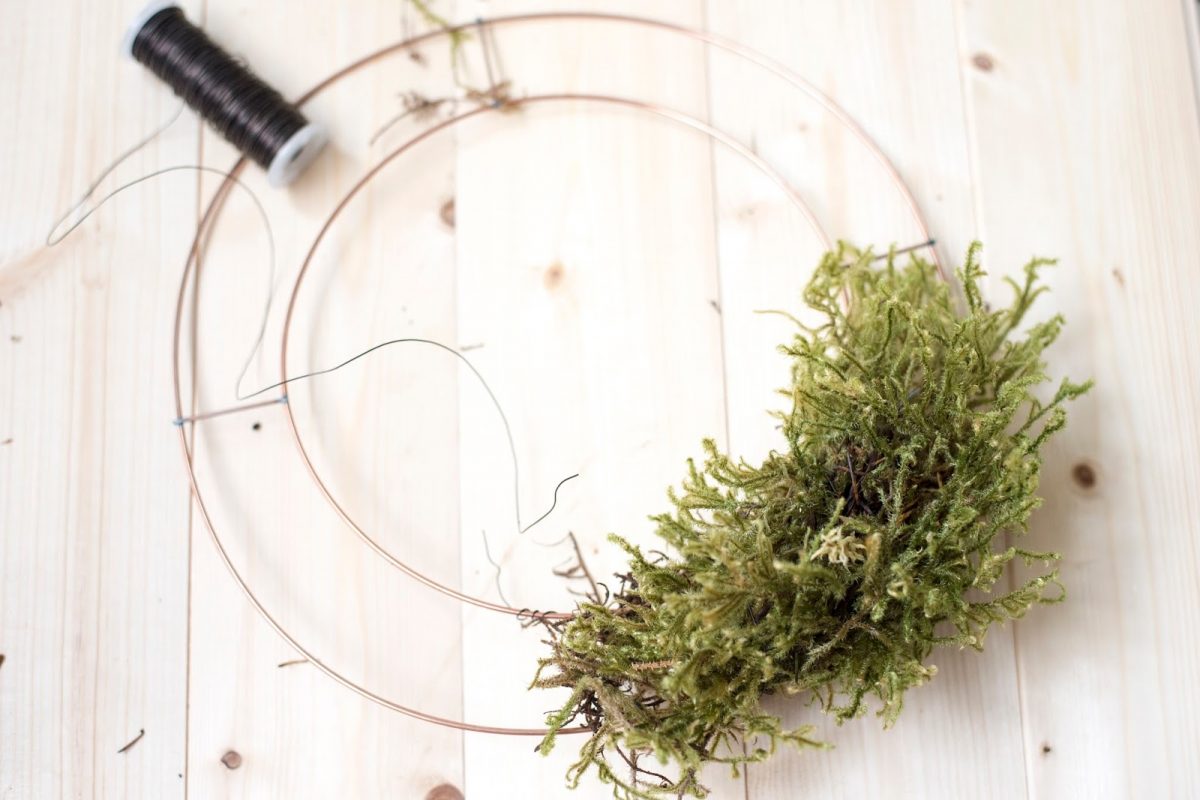
Everything you’re going to need is in the photo below! That’s it – and the metal bits are cheap and reusable! I got my wreath rings on Amazon in a pack of 10, along with some floral wire which was around £1 for a spool. The moss comes from a quick walk into the dense spots of young trees in the forest down here in Hampshire and the flowers as I said I’d bought from the flower market for my workshop, and some of them were from the trees in my garden too! Always look in your garden – some “weeds” are wildflowers and make the prettiest decorations.

Okay, so here we go!
First, break the moss into clumps. Push each clump of moss through the two bars of the wreath. Watch out for little friends, if you know what I mean! They love hiding in moss and so I flicked every piece of my moss to make sure no one was waiting to say hello! Once clear, hold the visitor-free moss in place between the bars and wind some of the floral wire around to secure. The shaggy moss will hide the wire and the colour camouflages any that shows. Weave it in and out to make sure your moss is secure, and repeat this until all of your ring is covered.
Secondly, when your wreath is fully stuffed with moss, you can start to add the flowers – position them where you like, thread and tuck the stems into the moss to disguise ends of stems, and using the wire, secure those too. I shaped my wire like little croquet hoops or staples, to hairpin them into the moss.
Finally, hold your wreath up carefully. Make sure everything is secure and you’re ready to hang it!
It really is that simple!
Pin for later!






![Homemade Christmas Pot Pourri [How To Dry Oranges]](https://keep-up-with-the-jones-family.com/wp-content/uploads/2014/12/oranges.jpg)





It's a beautiful creation! You make it look so easy and straightforward too; great little tutorial. I can see why you love it so much 🙂
This is absolutely stunning!
I've never made a wreath from scratch with a frame and moss, I've always used ready-made ones but you do make it sound very simple.
Oh this is beautiful. I wish you lived closer so you could make me one. I would love to make one with you!
Oh wow this is just stunning, I see these and think id love to make one but it is bound do be too difficult and then don't bother but now I might just have to give it a go.
What a gorgeous wreath and I bet it smells lovely and fresh. I don't think I would make it so easily.
Girl…. this is GORGEOUS! Come over and make me lots of pretty wreaths please!
They are beautiful and they really reflect the season.
I wish I'd read this earlier, I emptied a pile of moss out of my birdbath the other day!
Oh my word, that's beautiful!
I would love to be able to make something as pretty as that x x
That is beautiful, never thought of making a wreath this time of the year
Saved for next Spring!
A stunning wreath. Have never tried to make my own but may now give it a go.